Back to ChoralHub

ChoralHub Handbook

ChoralHub El Kitabı

v2.29.1

Everything the app does, and who is allowed to do it. Choose your role and the guide drops whatever does not apply to you.

Uygulamanın yaptığı her şey ve bunları kimin yapabildiği. Rolünüzü seçin, kılavuz size uymayan her şeyi gizlesin.

My role

Nothing in the handbook matches that. Try a shorter word.

Start here

Six things that explain most of the confusion.

Where it lives

Sign in at app.choral-hub.com. Old links to choral-hub.com still carry you there.

A choir comes first

Until you are a member of an approved choir, almost every menu is empty. Join one, or create one.

You are in one season

Rehearsals, pieces, recordings and announcements all belong to a season. You see the active one.

Six languages

English, Turkish, German, French, Spanish and Italian, switched from the header at any time.

What changed

The version number in the app's footer opens the changelog, written for singers rather than developers.

Three roles

Singer Assistant Admin / Owner and the switcher above filters this page to yours.

Getting in

An account, then a choir. They are two separate steps.

Your account

Sign up with your name, email, password and voice part. Signing up does not put you in a choir. If you forget your password, the sign-in page will email you a reset link.

Joining a choir

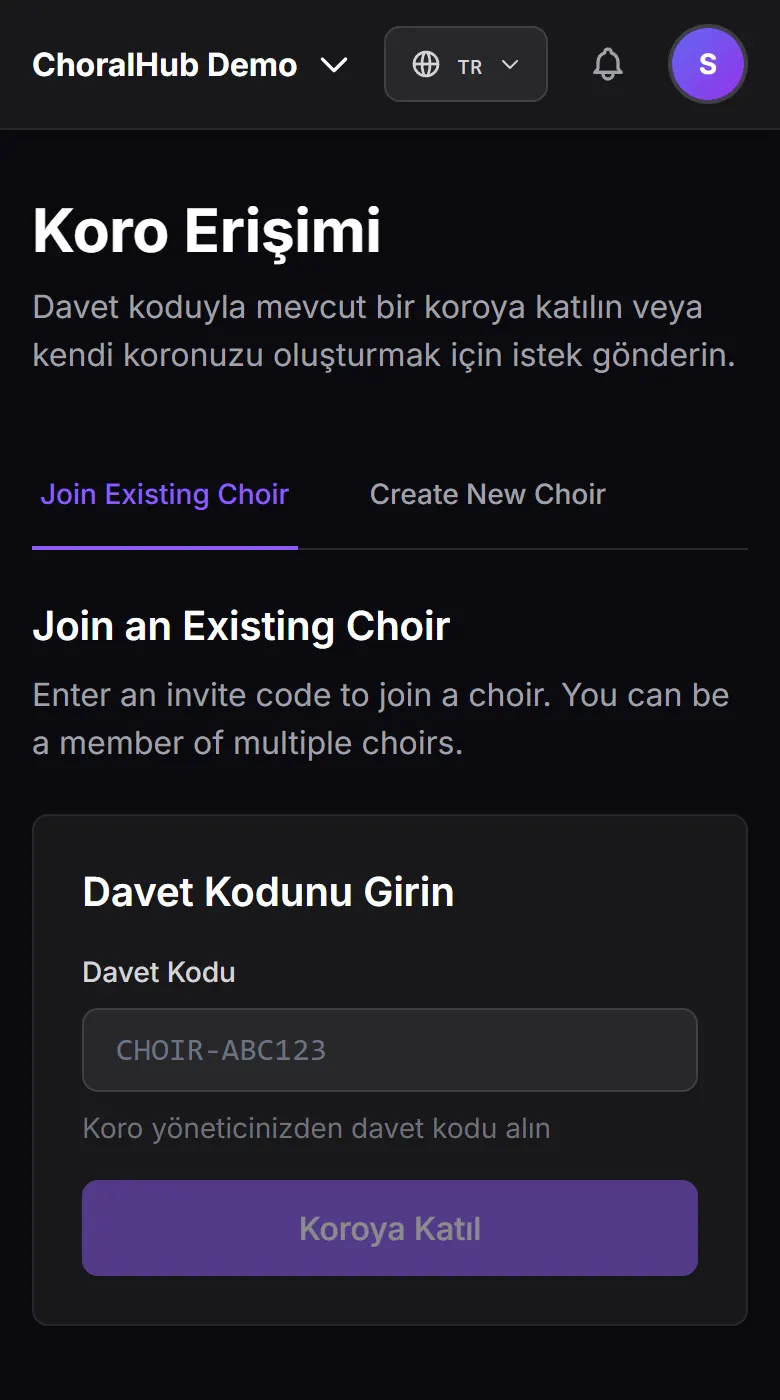
  1. Ask an admin in the choir for its invite code.
  2. Enter it in the invite code box. If you are not in any choir yet, the dashboard offers Join a Choir. If you already sing in one, open the menu under your avatar and choose Manage Choirs › Join Choir.
  3. That sends a join request. You will see it marked pending.
  4. An admin approves it, and the choir appears.

Nobody joins silently. The code alone does not admit you.
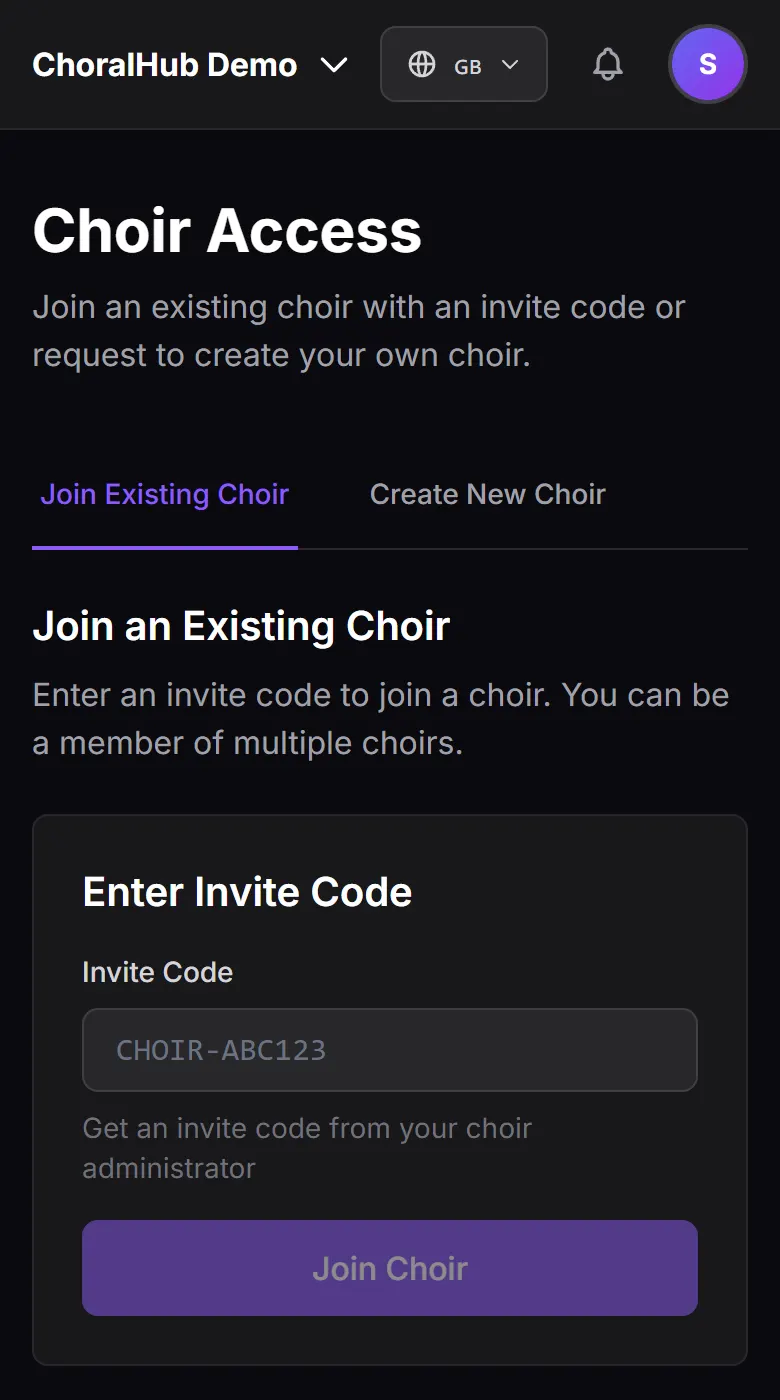
The Choir Access page with the invite code field
The invite code box. Nothing happens until an admin approves.

Creating a choir

From Create Choir on the dashboard if you are not in any choir yet, otherwise from the menu under your avatar: Manage Choirs › Create New Choir. The request goes to the platform administrators, not to you. Once they approve it you become its Owner, which cannot be handed over or taken away, and the choir gets its first season automatically.

Belonging to more than one

You can sing in several choirs with a different role in each. The choir switcher in the header sets your active choir, and everything on every page follows it.

Choir and season

Two filters sit under every list in the app. When something is missing, one of them is usually why.

The active choir decides whose material you are looking at. The active season decides which year of it. A list is never the whole database, it is the intersection of those two.

The active season's name is always at the top of the menu, above Dashboard, and under the choir name on the dashboard's choir card. On a phone it also sits under the choir name in the top bar.

So a piece your choir sang last year will not be in this year's library. It is not lost. Every piece lives in the choir's library, and an admin turns it on for this season from Admin › Library or with Add from Library. Past seasons stay readable in Admin › Seasons.

No active season, no content. If a choir has ended its season without starting the next one, every content page shows a banner instead of a list. Start or activate a season in Admin › Seasons.

Home

The landing page after sign-in.
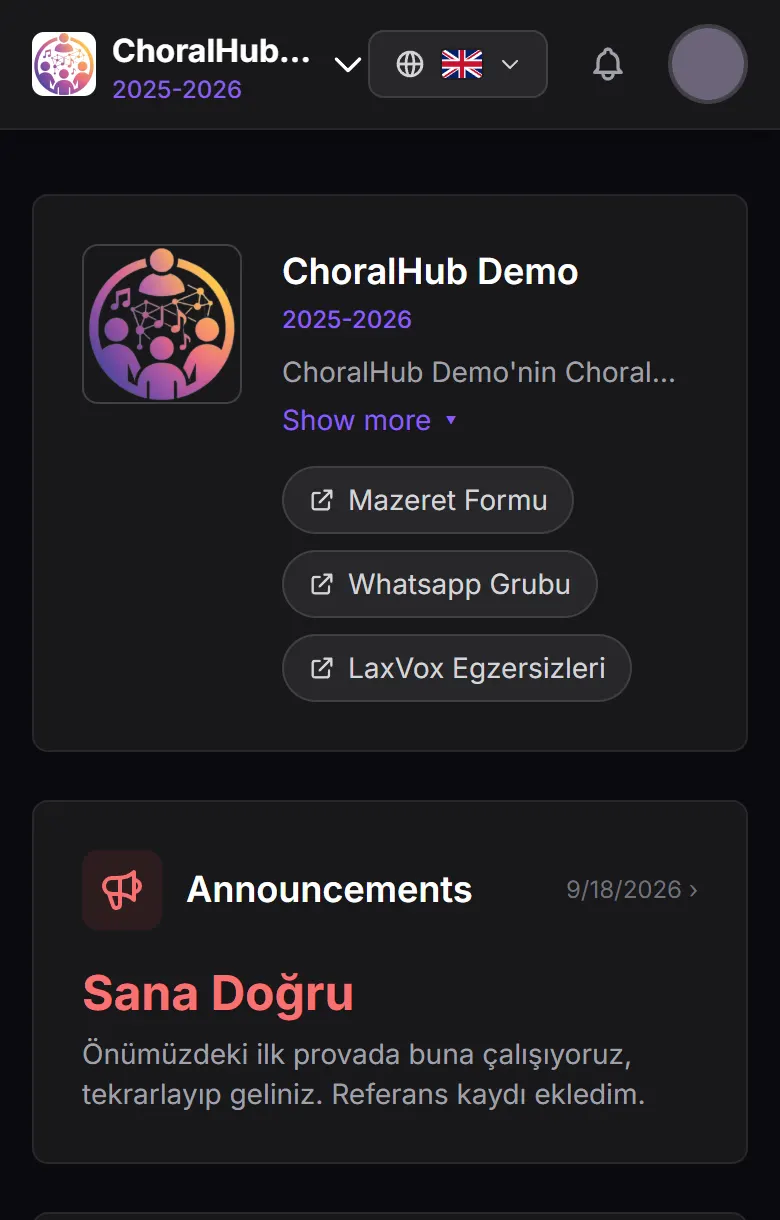
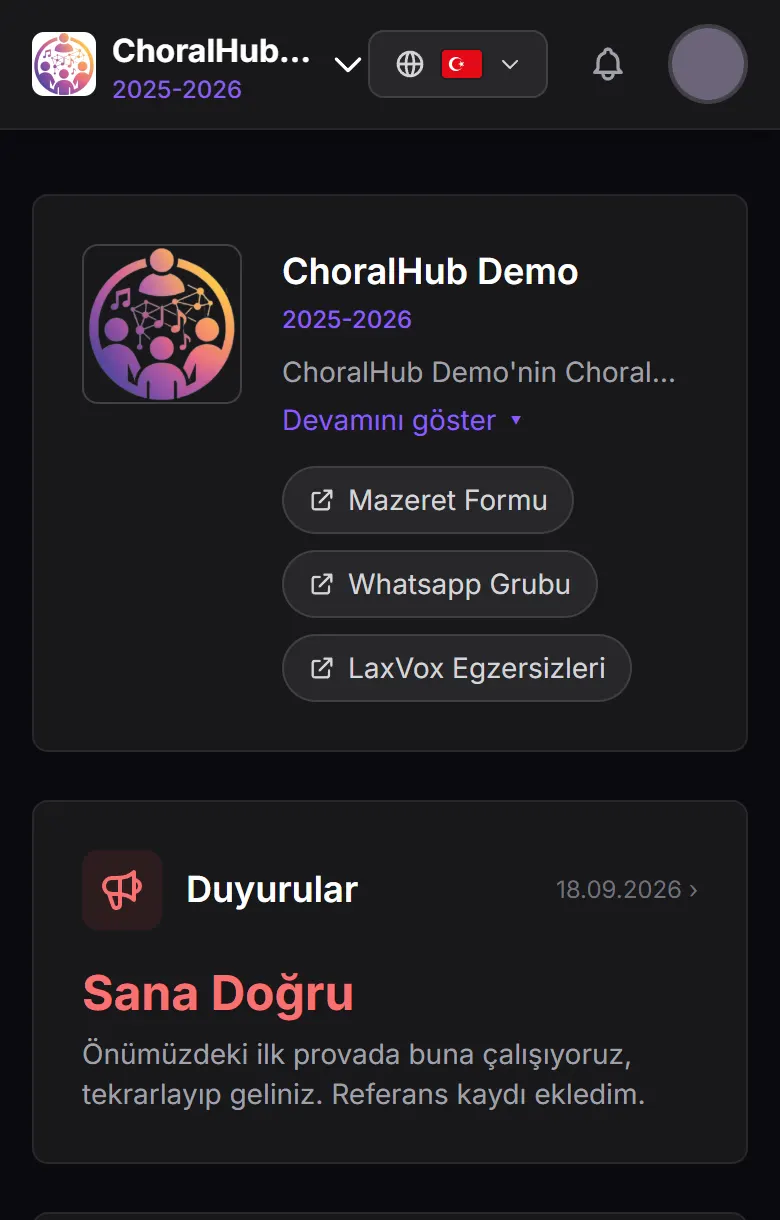
Home: the choir card with its links, then the newest announcement
The choir's own card, then the newest announcement.
  • The choir's own card if an admin has filled it in: logo, a description, and useful links such as a shared drive or a concert page. A long description shows its first line, with Show more for the rest. Tap the logo or the choir's name to open the Choir page.
  • The newest announcement in a large card, with the start of its text. Tap it to open Announcements.
  • One line each for your next rehearsal (date, time and place), the season's latest pieces and your recordings, beside the season's calendar. Tap a line to open its page; on the calendar a dot marks each rehearsal day, tap a day to see what is on. The next rehearsal moves on once it has finished rather than at midnight. When a concert is coming up, a Next concert line counts the days to it, and concert days carry a gold dot on the calendar.
  • This choir's notifications in a card under those lines (the bell at the top shows all your choirs'; one from another choir carries that choir's name, and opening it switches you to that choir first): feedback on your recordings, new pieces and new material, pieces added to a rehearsal you are called to. Tap one to open it; × deletes it.
  • A rehearsal you are not called to still appears, so you know it is happening, but greyed out and marked You are not called for this one. Do not turn up for it.
  • Quick actions: add a piece, schedule a rehearsal, post an announcement.

Pieces

The library. One page per piece, holding everything you need to learn it.

The Pieces page lists the season's pieces like files. If your choir has repertoires, each concert sits above them as a folder: open it to see its pieces in programme order, and press All pieces to come back. Concert details inside a folder opens the repertoire's own page, with its roster and formation.

What a piece can carry

  • A score. The PDF opens in the page. There is a fullscreen button, and on a phone or tablet you pinch to zoom the music itself.
  • A tutti MIDI. One MIDI file with every part in it, for the practice player below.
  • Voice part tracks. One audio file per part, played together in the built-in player.
  • Pronunciation recordings. Someone reading the text aloud. A piece can hold several, each with its own name, so a plain read, a rhythmic reading and a poetic one can all sit side by side. They play on their own, not mixed with the parts.
  • A lyrics translation. A PDF is shown in the page, a Word file downloads.
  • A reference recording, as a YouTube video or a Spotify track, played in the page.
  • A description, and comments from anyone in the choir.

Listen

A piece's players sit together in one Listen card. When the piece has a MIDI file and voice part tracks, a switch at the top chooses between MIDI and Voice parts. It opens on MIDI. Switching stops whatever was playing.

The MIDI practice player

The MIDI player is built for learning your line:

  • Slow it down to 50% or 75%, or step the tempo up and down. The pitch stays the same.
  • Loop four bars from where you are with one tap. Change the bars in the box that appears.
  • Jump anywhere by dragging or tapping the timeline. ‹‹ and ›› move one bar at a time.
  • Bring your part forward with ◎ beside it: your part gets louder and the rest quieter. M mutes a part and S plays it alone. Parts the file doesn't name are named from their range (Soprano, Alto, Tenor, Bass); Names: From file shows the file's own labels instead.
  • Choose the sound (choir, piano, winds or strings) and transpose by semitones.
  • Metronome under Tempo: a click on every beat, higher on the first beat of the bar. It follows your tempo and loop, and keeps going when you play one part alone.

The controls stay pinned under the top bar while you scroll down to the parts. The first press of Play downloads the instrument sound, which takes a moment on mobile data. On an iPhone, turn the silent switch off, or you will hear nothing.

The voice part player

When you open a piece, every part is prepared at once and each shows its own progress bar. After that they play locked together and stay that way, however long you listen. Muting a part or soloing one disturbs nothing.

A phone cannot always hold a long piece in every part at once. When it cannot, it tells you how many parts it can play, and you switch between them, turning one off and another on, even while the music is running.
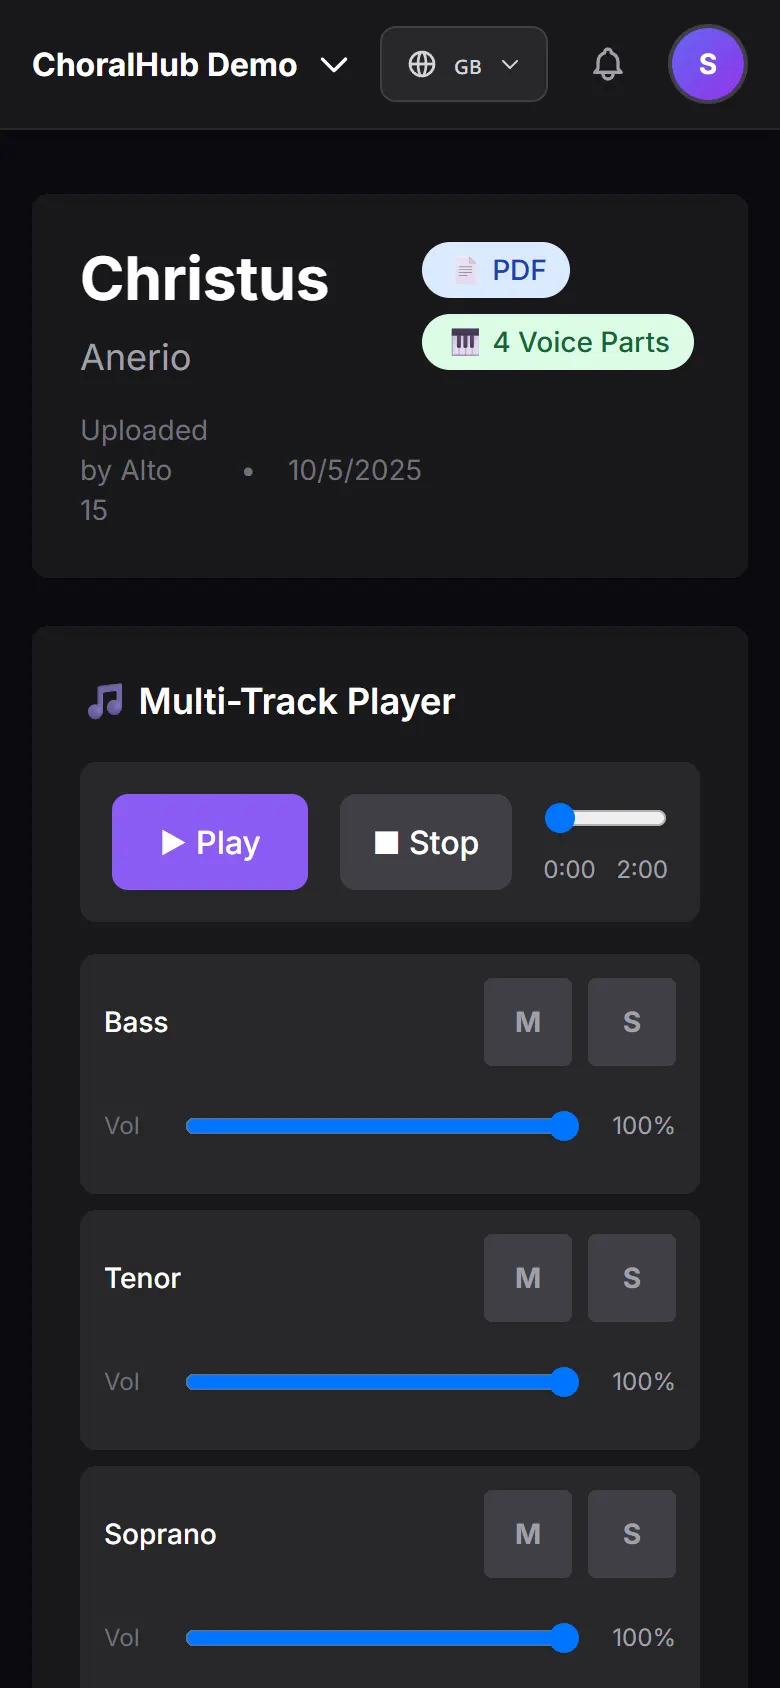
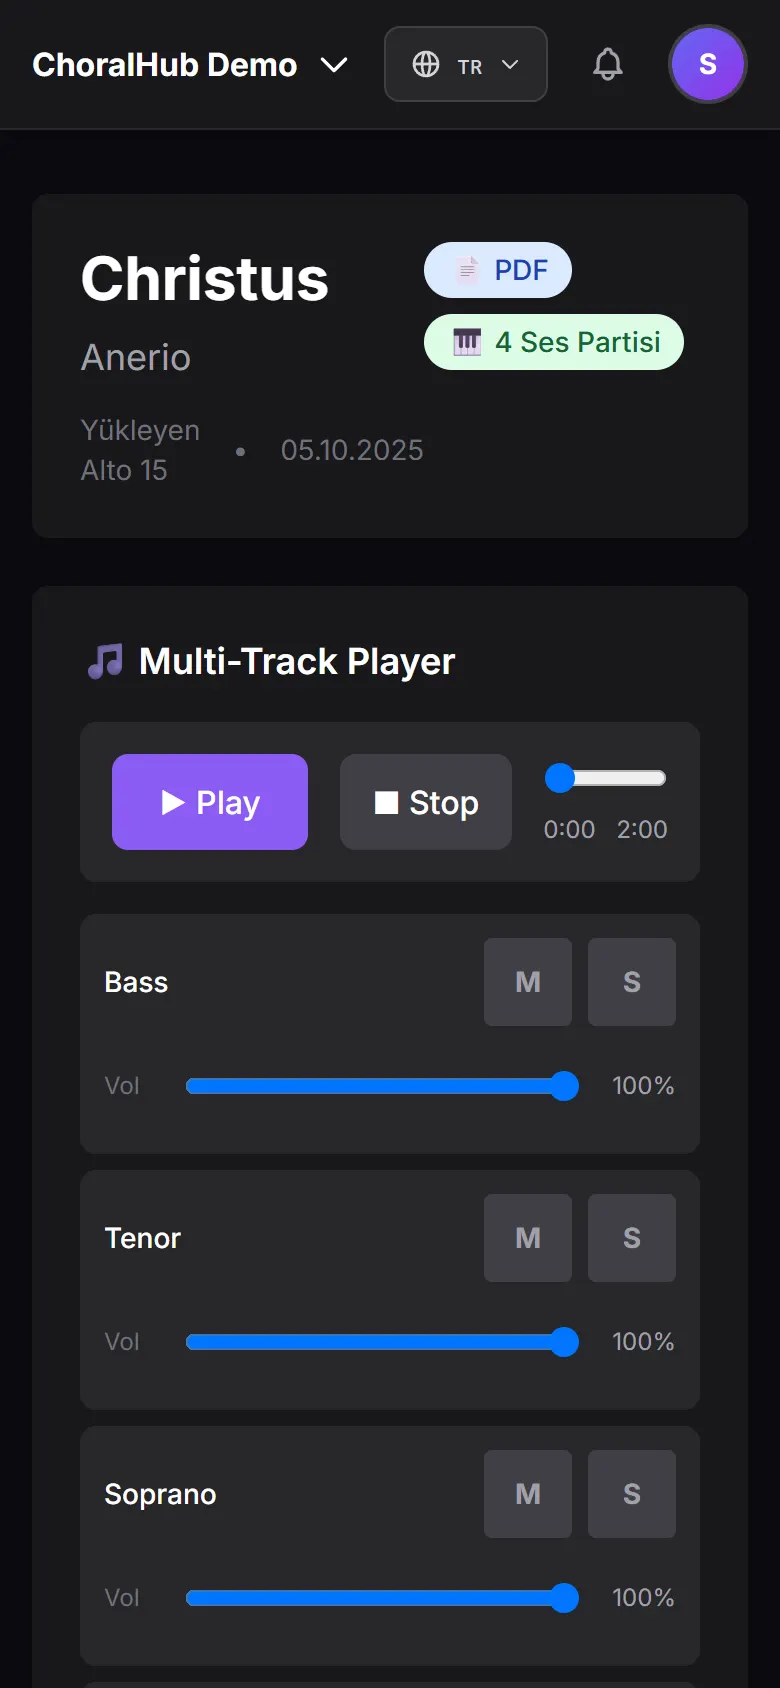
A piece page with the multi-track player: one row per voice part with mute, solo and volume
A piece and its player. M mutes a part, S plays it alone.

Adding a piece

Pieces › Add Piece

Put a new piece in the library

  1. Fill in the title and the composer. Both are required, nothing else is.
  2. Attach the score PDF.
  3. Under Voice parts, press Add Voice Part. Each one takes a label such as Soprano or Tenor 2 and its own audio file. Repeat for every part.
  4. Under Pronunciations, press Add Pronunciation the same way. Name each one for what it is, such as "slow read" or "spoken as a poem".
  5. Attach the lyrics translation, as a PDF or a Word file.
  6. If you have one, attach a tutti MIDI: one file with every part in it. Most notation software exports one.
  7. Paste a YouTube link, a Spotify link, or both.
  8. Upload. A progress bar counts the whole batch, not each file.

Files go straight to storage rather than through the app, so a full score or a long recording is fine. The piece is linked to the current season automatically.

The library

Every piece your choir has ever added lives in Admin › Library, whatever season it was for. Each piece has a switch for the current season. The arrow beside it opens the piece's other seasons as checkboxes, and Delete for good. The filters at the top show everything, only this season's pieces, or only the rest. Uploading from the Library lets you choose the seasons, with the current one ticked for you. Untick them all to keep a piece for later.

Add from Library on the pieces page does the same from the other side: it lists library pieces that are not in this season and turns on the ones you pick.

On a piece's own page, Disable for this season takes it out of the current season only. Its files, recordings and comments stay. Deleting a piece for good is done only in the Library, which names every season the piece is in before you confirm.

Rehearsals

The schedule, the roll call, and your own attendance record.

Finding them

The page has a list and a calendar, split into upcoming and past. On a phone the calendar is a compact month with a dot under each rehearsal day; tap a day to list its rehearsals underneath. Concerts appear on the calendar too, in gold (★): any repertoire with a concert date shows on that day and opens the repertoire. They are never rehearsals and are not added here. A rehearsal's own page has an Overview tab and an Attendance tab, plus the pieces being worked on and a comment thread.

Saying whether you are coming

On the Overview tab you set your RSVP: attending or not, with an optional note giving the reason. You can change it later. This is what you say in advance, and it is separate from the roll call taken on the night. Owners, admins and assistants who are called set theirs the same way, under the attendance summary.
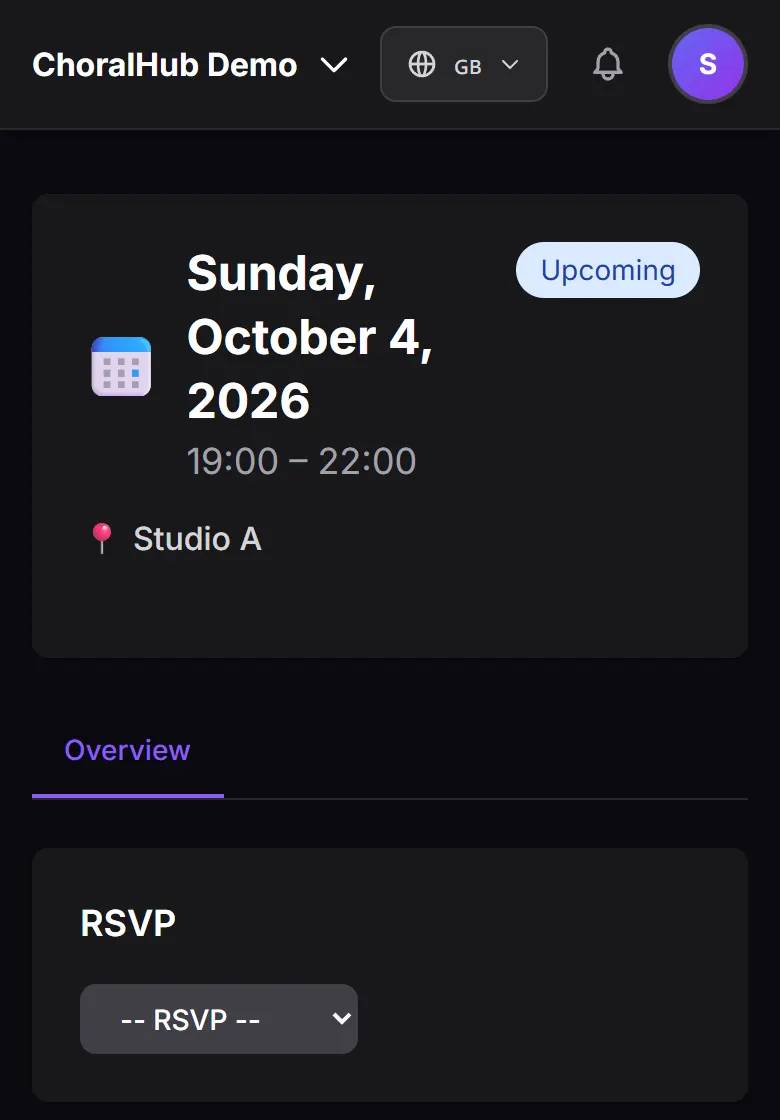
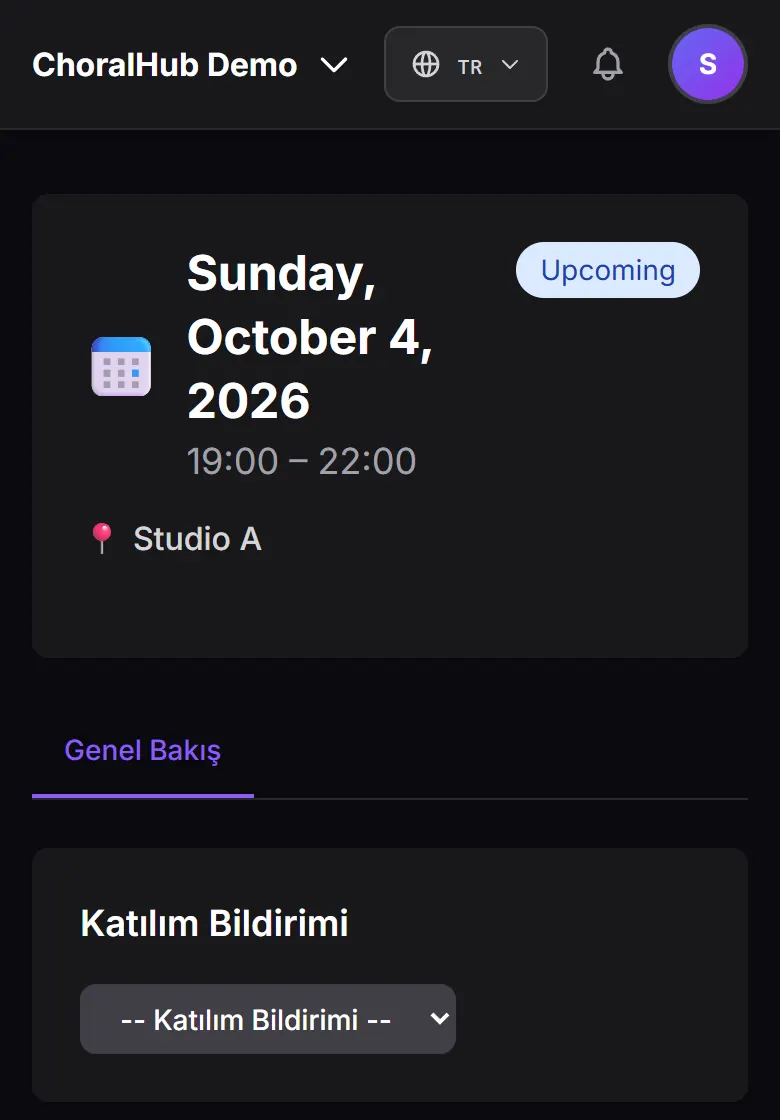
An upcoming rehearsal with the RSVP dropdown
An upcoming rehearsal. The RSVP is the dropdown under the date.

Rehearsals that are not for everyone

A rehearsal can be called for particular voice parts or named people. If you were not called, it is greyed out on your dashboard and marked as such, you do not appear on the roll call, you are not asked for an RSVP, and you cannot be marked absent.

Taking the roll call

On the Attendance tab. Five states, one per person: present, absent, excused, late and left early. Each row takes a reason (Reason). Everyone starts as present, so you only change the exceptions and press Save changes. A summary on top shows the attendance rate and each section. Present people are hidden until you switch on Show present; searching for a name always shows them. Sort the list by voice part, where each section folds open and shut, or by absence.

The Overview tab carries the statistics for that rehearsal once you have finished.

Your own record

Rehearsals › My Attendance shows your percentage for the season and every rehearsal behind it.

Admins can open the same record for anyone, from the members list.

Rehearsals › the rehearsal › Attendance

Take the roll call

  1. Open the rehearsal and switch to the Attendance tab.
  2. Only people who were called appear, and everyone starts as Present. Present people are hidden: switch on Show present, or search for a name. Change only those who were Absent, Excused, Late or Left Early.
  3. Press Reason on a row to write why, for example ill or travelling.
  4. Press Save changes. Nothing is recorded until you do.

The Overview tab carries the statistics once you are finished. Assistants can do all of this.

Creating one

  • When and where: date, start time, end time, location. The app uses a 24-hour clock everywhere.
  • Who leads it: the conductor's name.
  • Target group: a free-text label for the rehearsal, the kadro.
  • Who is called: leave it as the whole choir, or pick voice parts, or pick individual singers.
  • Pieces: link what you plan to work on.
  • Notes: anything the choir should read beforehand.

A term's worth at once

Rehearsals › Bulk Create

Schedule a whole term

  1. Set the start date and the end date of the term.
  2. Tick the weekdays you rehearse on, and set the time and location, which are the same for all of them.
  3. Read the preview. It lists every rehearsal it is about to create, with a count.
  4. Press the create button.

Deleting works the same way. On the calendar, select a day and delete everything on it, or tick individual rehearsals and delete only those.

Edit, do not delete and recreate. Deleting a rehearsal takes its attendance, its comments and its linked pieces with it. If the date or the room changed, edit the rehearsal instead.

Recordings

Recording tasks set by an admin, and everything you have submitted.

Two tabs: Tasks and My Recordings.

Tasks

A task names a piece, a deadline and what is being asked for. You record on your phone and upload the file against the task. Recording inside the app was removed because holding a phone near you produced far better results.

  • Each task shows whether it is active or expired, and how long you have.
  • Re-uploading replaces your previous take. Any feedback already left on it is kept, marked on an earlier take.
  • After the deadline the upload is refused. The task stays visible so you can see what you missed.
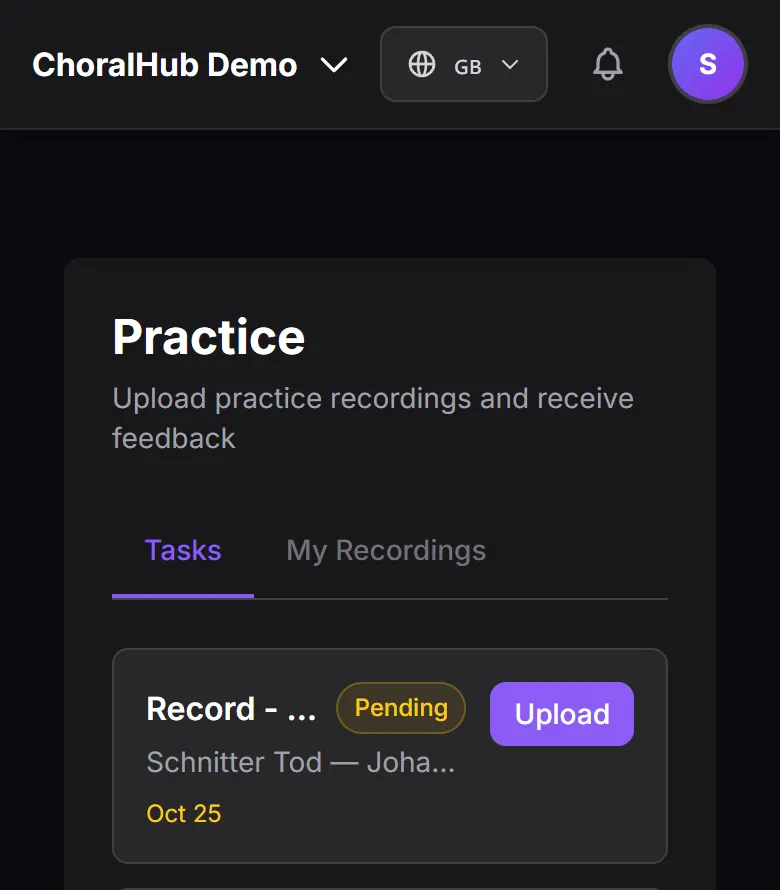
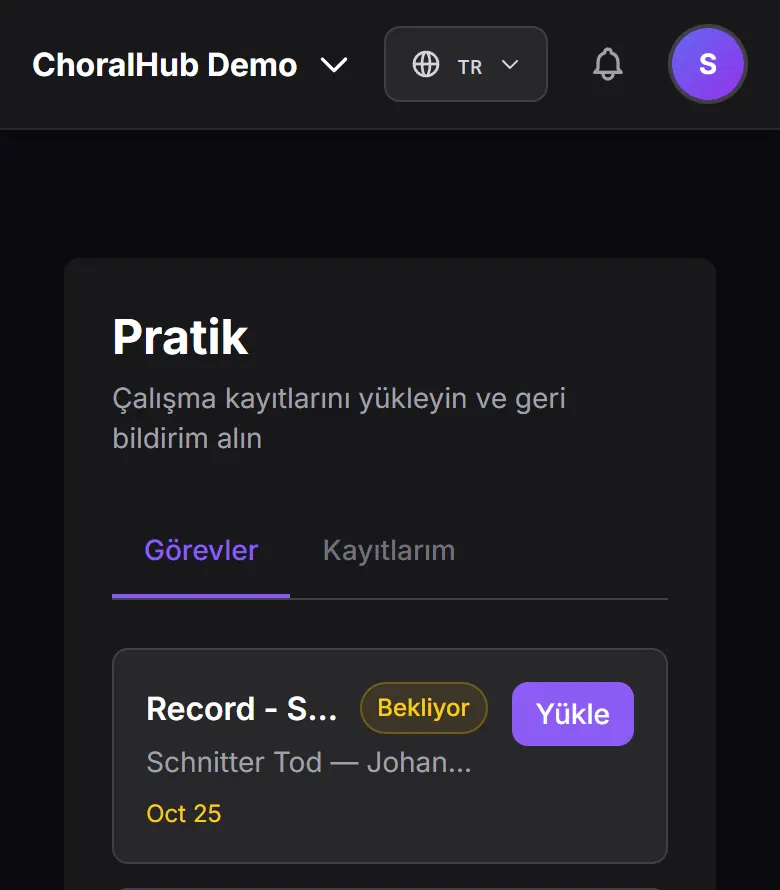
The Practice page with one pending task and its Upload button
A task still open, with its deadline and the Upload button.

Feedback

Feedback appears under the recording it belongs to. Only admins write it. When it arrives, the bell at the top of the screen tells you; tap the notification to open the recording. The × beside a notification deletes it, and Delete all at the top clears the list.

The bell also tells owners and admins each time a singer uploads a recording. Assistants are not told, since they cannot play other people's recordings.

Review submissions in Admin › Recordings. It has a player, the previous feedback, and next and previous buttons so you can work straight through a batch without going back to the list. Set the tasks themselves up in Admin › Recordings › Tasks, or from a piece's own page.

Your choir may not use this. Practice can be switched off for the whole choir, in which case it disappears from the menu. Nothing is deleted, and switching it back on brings everything back.

Announcements

News for the whole choir.

Announcements go to everyone in the choir. Each one takes comments and emoji reactions, so a question about a concert call time is answered in the same place it was asked.

Announcements › New

Send the concert details out

  1. Write the title and the message.
  2. Attach a PDF if there is a programme or a schedule.
  3. Add a link if there is somewhere to send people.
  4. Post. Everyone in the choir sees it, and the newest one leads the Home page.

Questions come back as comments on the announcement itself, so the answer stays with the question.

Repertoires

A concert, as a setlist rather than a library.

A repertoire gathers pieces into the order you will actually perform them, with a concert date and a description. Anyone in the choir can open one and see the programme. Giving it a concert date puts it on the calendar as a concert; changing or removing the date moves or removes it there too.

  • Programme order is set by dragging pieces into place.
  • The roster records who is singing this particular concert, which is often not the whole choir.
  • A stage formation can be attached from the ones already saved. Once it is, every member can see where they stand.
Repertoires › Create

Build a concert programme

  1. Give it a name, a concert date and a description.
  2. On its page, use Manage pieces to add each piece from the library.
  3. Drag the pieces by their handles into performance order.
  4. Under Concert roster, press Set Roster and tick who is singing. Select All is there if it is everybody.
  5. Under Formation, pick one you saved in the Formation Calculator.

Once a formation is attached, every member opening the repertoire can see where they stand. Without one, that section simply does not appear.

Choir and members

Who is in the choir.

Tap the choir's name at the top left (on a phone: Choir in the menu), or the logo or name on the home page's choir card. The Choir page shows the choir's description and links, then everyone in it.

The directory shows everyone grouped by voice part, with a count for each section at the top — tap a count to show only that section. Search by name, or press Staff to see only the owner, admins and assistants. Clicking someone opens their card: photo, voice part, role and when they joined. Phone, address and blood group are not shown to other singers.

Role badges are colour-coded: gold for the owner, purple for admins, blue for assistants, grey for members.

If you manage members, it is the same page with more on it. Each person's card adds their contact details and a Staff only box where you change their role, open their attendance and recordings, set an admin's permissions (owner only) or remove them from the choir. A Show Emergency Info button above the list switches to blood group, phone, address and whether they have a car. The owner cannot be removed or demoted.

Your profile

Three tabs, and two fields that do more than they look like they do.

  • Personal: name, photo, and the language the app speaks to you in.
  • Musical: your voice part, and your height.
  • Contact & Emergency: phone, address, up to two emergency contacts, whether you have a car, and a Health and diet box.

Voice parts are Soprano, Mezzo-Soprano, Alto, Tenor, Baritone and Bass.

Height is not vanity. The formation calculator orders each row by height, so an empty height field puts you in the wrong place on stage. Contact details are for emergencies and travel. Other singers never see them; only the people who manage the choir's members do.

Health and diet (blood group, known illnesses, regular medicines, allergies, diet) sits behind one consent box of its own, because it is health data. Every field is optional. Only your choir's owner and administrators can see it, and unticking the box deletes all of it.

Notifications on your phone or computer

At the bottom of your profile, Browser notifications › Turn on makes everything that lands in the bell also pop up on that device, even with ChoralHub closed. Home offers the same switch on a device where it is off; Not now hides that offer. Tapping a notification opens the page it is about. It is per device, so turn it on on each phone or computer you use, and signing out turns it off for that device. On iPhone and iPad, first add ChoralHub to your Home Screen (Share, then Add to Home Screen), open it from there, and turn it on inside.

Choir preferences

Separately from your profile you can name the people you blend best with and the people you like standing next to. These are per choir, since they are about a specific set of voices.

Admin panel

A page of cards, plus an Admin section in the sidebar. Owners and admins see it. Assistants do not.

The panel itself is a page of cards: Manage Members (which opens Members), Review Recordings, Recording Tasks, Customise Layout, Manage Seasons, Formation Calculator, Edit Choir Info and Review Join Requests. Above them sit three shortcuts you will use most: Add New Piece, Schedule Rehearsal and Post Announcement.

The sidebar also carries an Admin section, holding the five pages worth reaching in one click: Season Progress, Join Requests, Seasons, Choir Info and Formation. Overview at the top of that section is this cards page. Press the heading to fold the section away; the number of join requests waiting still shows beside it. On a phone the menu keeps only Admin, and everything else is reached from there.

Seasons

The most consequential page in the panel, because the active season decides what every other page shows. Creating one is a chain of three dialogues that open automatically one after the other. Do not close the second or third early.

Admin › Manage Seasons

Start a new season

  1. Press New Season.
  2. Fill in Season Name, Start Date and End Date. The end date is optional.
  3. Press Create. The Who sang this season dialogue opens on its own.
  4. Everyone currently in the choir is already ticked, and the owner always is. This list is a record for the season archive only: unticking someone does not remove them or limit what they see. To take someone out of the choir, use the Members page.
  5. Press Confirm. The Import Pieces dialogue opens next.
  6. Tick the pieces from earlier seasons you are keeping, then Confirm.

Skipping step 6 is recoverable. Use Add from Library on the pieces page whenever you want them.

Admin › Manage Seasons

Close the year off

  1. Press End Season on the active season and confirm.
  2. The choir now has no active season, and every content page shows a banner instead of a list.
  3. Create the next one, or press Continue on a past season to reactivate it.

Read a past season without reactivating it: press View on it. An active season cannot be deleted, so end it first.

Season progress

Where the choir has got to with each piece of the season. You already know this; nothing in the app did, so nobody else could look it up. Six steps, in order: Not started, Learning notes, Sings it through, Memorised, Polishing, Concert ready. The bar fills as you climb, and the number at the top of the page is the average across the season.

Singers do not see any of this. The stage beside a piece is visible to owners, admins and assistants only: "this piece is not ready" is a judgement you make for your own planning, and out of context it tells a singer something discouraging rather than something useful. Owners and admins change a stage; an assistant can see where a piece stands but not decide it.

Progress belongs to a season, so a piece you sing again next season starts at Not started rather than inheriting last year's answer. A piece has to be in the active season's repertoire to appear at all.

Admin › Season Progress

Move a piece up

  1. The list opens least ready first, so what still needs work is at the top.
  2. Press Update on the piece.
  3. Pick the step it has reached.
  4. Choose which rehearsal moved it. The list is this season's recent rehearsals, newest first, and it starts on the last one that worked on that piece. If the decision did not come from a rehearsal — after listening back to submitted recordings, say — pick No rehearsal.
  5. Add a note if there is something to say about what still needs work. It is optional.
  6. Press Save.

Going backwards is allowed. A piece left alone for a month does get worse, and recording that is more honest than pretending it did not.

Naming the rehearsal is worth the extra second: it is what lets the history and the timeline say what moved a piece rather than only when. Only rehearsals that have already happened are offered, and only from the season you are running.

Rehearsals › any rehearsal

Update it in the room

  1. Open the rehearsal. Each piece in the Pieces list shows the step it had reached as of that rehearsal — not where it stands today. A rehearsal page is a record of that night, so opening one from August shows August's answer.
  2. Press Update beside the piece and pick the new step.

An update made here is stamped with the rehearsal, so the history says which rehearsal moved the piece and not merely when.

Admin › Season Progress

Read the history, or undo a mis-click

  1. Press the update count on the piece, for example 6 updates.
  2. Every change is listed newest first, with who made it, when, and any note.
  3. Press Delete on a wrong entry.

Deleting the newest entry makes the one before it current again. Delete a mistake, not history you would rather forget.

Categories, and the season's timeline

The progress page has three tabs. Now is the list above. Timeline charts how the season has gone. Categories is where you group the repertoire the way you actually think about it.

A category is your own grouping — acapella, symphonic, the pieces for a particular kind of concert. A piece can be in several at once, and anything you have not filed counts as Other. This is not a concert repertoire: a repertoire is the setlist for one concert, with its date and its roster, while a category is broader and carries on across several concerts.

Everything on all three tabs is the active season. A piece that is not in the season you are running does not appear and is not counted, so the numbers on the page always add up to the season in front of you.

Admin › Season Progress › Categories

Make a category and fill it

  1. Type a name in the box at the top and press Add.
  2. Press Edit pieces on the category you just made.
  3. Tick the pieces that belong to it. The search box narrows a long list.
  4. Press Save.

The counts move as you save: pieces leave Other as you file them. Deleting a category never deletes a piece — its pieces simply go back to Other.

Admin › Season Progress › Timeline

See how the season has gone

  1. The top chart is readiness over time, one line per category, plus a thicker line for the whole season.
  2. The bottom chart shows how each group's pieces sit across the six steps today.
  3. Press a name in the Show row to hide or show that group. Both charts follow.

Read the two together. A group at 60% because every piece is half-learnt and a group at 60% because half the pieces are finished and half untouched are very different problems, and only the lower chart tells them apart.

The lines are drawn from the progress you have already been recording — nothing had to be turned on. A piece holds its step on days you did not touch it, so a quiet fortnight shows as a flat line rather than a dip. The line runs to today even if the last thing you recorded was weeks ago, and the empty space after it is how much season is left.

An update is dated by the rehearsal you name, not by the day you type it. That is what makes the picture honest if you fill a season in after the fact: record what happened at the October rehearsal and it lands in October. So you can sit down once, walk forward through the term, and get a true timeline out of it. If a judgement did not come from a rehearsal, No rehearsal dates it today.

Members

Members

Promote someone

  1. Find them with the search box, or tap their voice section at the top.
  2. Open their card and, in the Staff only box, change Role to Admin or Assistant.
  3. Confirm the prompt.

The owner's card has no role dropdown and no remove button. That is deliberate and there is no way around it in the app.

Members

Get someone's phone number in a hurry

  1. Press Show Emergency Info.
  2. A red Emergency Mode Active bar appears, and each person's card shows blood type, phone, height, address, whether they have a car, their emergency contacts, and any allergies, illnesses or medicines they chose to share.
  3. The search box widens with it. You can now search by blood type or phone number.
  4. Press Hide Emergency Info when you are done.

Members fill these in themselves under Profile. A blank field means nobody has entered it.

Recording tasks

Admin › Recording Tasks

Ask the choir for a recording

  1. Press Create Task.
  2. Choose the Piece from the dropdown. Required, and it only lists pieces in the current season.
  3. Write a Task Title. Required.
  4. Add a Description if you want to say which bars or which part.
  5. Set the Deadline. Required, and it is enforced. Uploads are refused after it.
  6. Save. The task appears to members on their Practice page immediately.

Each task card then shows Active or Expired and a submission count. View Submissions opens them. Deleting a task does not delete the recordings already made against it.

Admin › Review Recordings

Work through a batch of submissions

  1. Sort with Sort by:, or search by singer, piece or voice part.
  2. Press Review on the first row. A player opens.
  3. Listen, then type into Add Feedback and press Submit Feedback.
  4. Press Next, or use the arrow keys, to move on without closing.
  5. Esc closes the reviewer.

Previous feedback on the same recording is shown above the box, so you can see what you already told them.

Formation

Three decisions, then the arrangement. The style matters more than people expect, so it is worth knowing all three before you press the button.

  • Mixed (Balanced Blend). Voice parts interleaved, so the sound blends across the whole choir.
  • Grouped Sections (SATB). All the sopranos together, all the altos together, and so on. The conventional rehearsal layout.
  • Traditional Arc (Performance). Basses on the edges, high voices in the centre.
Admin › Formation Calculator

Build a stage arrangement

  1. Set Number of Rows, between 1 and 5.
  2. Pick a Formation Style from the three above. The small circled i beside it explains them in the page.
  3. Under Chorists in this formation, press Choose. Everyone is included by default, which is rarely what a concert wants.
  4. Untick whoever is not standing, or start from Clear and tick the ones who are. Press Done.
  5. Press Generate Formation.
  6. Drag anyone to a different position if the algorithm put them somewhere awkward.
  7. Press Save Formation and give it a name such as "Spring Concert".

Within each row people are ordered by height, so anyone with an empty height on their profile lands in the wrong place. Print Formation gives you a sheet to take to the hall, and a saved formation can be attached to a repertoire so the whole choir can see it.

Choir info

Admin › Edit Choir Info

Put something in front of the whole choir permanently

  1. Press Upload Logo. JPEG, PNG or WebP, up to 5MB.
  2. Write the About the Choir text. It appears on every member's dashboard.
  3. Press Add Link for each useful link, filling in a label and a URL. A shared drive, the website, a social account.
  4. Press Save Changes.

This is the fastest way to give everyone something they will need all season. An announcement scrolls away, the choir card does not.

Join requests

Admin › Review Join Requests

Let somebody in

  1. The page lists everyone who entered your invite code, with the date they asked.
  2. Press Approve or Reject.

Approved people appear in Members straight away, as a plain member. Promote them afterwards if they need more.

The invite code

It is not in the Admin panel. Open the menu under your avatar and choose Manage Choirs. The code sits on your choir's card with a Copy button, visible to owners and admins only. There is no way to regenerate it in the app, so treat it as permanent and hand it out deliberately.

Customise layout

Admin › Customise Layout

Hide a part of the app your choir does not use

  1. Switch off Practice & Recordings.
  2. Press save. A green Saved appears.

The Practice entry disappears from everyone's menu, and recordings vanish from piece pages too. Nothing is deleted. Switch it back on and every task, recording and piece of feedback is exactly where it was.

Who can do what

Owner and admin are identical in practice. Assistant is a narrower role, not a junior admin.

An assistant exists to help run rehearsals. They take the roll call, attach pieces and write rehearsal comments. They never see the Admin panel, and they cannot change roles, manage seasons or leave feedback on recordings.

Action Singer Assistant Admin / Owner
Pieces
Open scores, parts and translationsYesYesYes
Comment on a pieceYesYesYes
Add, edit or delete a pieceNoNoYes
See how far a piece has been preparedNoYesYes
Record how far a piece has been preparedNoNoYes
Rehearsals
See the schedule and RSVPYesYesYes
See your own attendance recordYesYesYes
Take the roll callNoYesYes
Attach pieces to a rehearsalNoYesYes
Write a rehearsal commentNoYesYes
Create, edit or delete a rehearsalNoNoYes
See anyone else's attendance recordNoNoYes
Practice
Upload against a taskYesYesYes
Set a recording taskNoNoYes
Leave feedback on a recordingNoNoYes
Hear other people's recordingsNoNoYes
Announcements and concerts
Read, comment and reactYesYesYes
Post an announcementNoNoYes
See repertoires and stage formationsYesYesYes
Build a repertoire or a formationNoNoYes
The choir itself
Browse the members directoryYesYesYes
Open the Admin panelNoNoYes
Change roles or remove membersNoNoYes
See emergency contact detailsNoNoYes
See and share the invite codeNoNoYes
Approve join requestsNoNoYes
Manage seasons and choir infoNoNoYes

Only the choir's owner can be neither removed nor demoted. In everything above, owner and admin behave the same.

Glossary

Words the app uses in a particular way.

Active choir
The choir every page is currently showing. Set with the switcher in the header when you belong to more than one.
Season
A working year. Rehearsals, pieces, recordings and announcements each belong to one, which is why last year's material does not clutter this year's lists.
Called
Being on the list of people a particular rehearsal is for. If you are not called, you cannot be marked absent for it.
Target group
The kadro. A free-text label on a rehearsal saying who or what it is for, written for humans rather than used as a filter.
RSVP
What you say in advance about whether you are coming. Separate from the roll call, which records what actually happened.
Roll call
Attendance taken on the night. Present, absent, excused, late or left early, one state per person.
Task
A recording an admin has asked for: a piece, a deadline and a description. Uploading again replaces your previous take.
Repertoire
A concert programme. Pieces in performance order, a roster of who is singing, and optionally the stage formation.
Formation
A saved stage arrangement, built in one of three styles: blended, grouped by section, or a traditional arc. Each row is ordered by height, and anything can be dragged by hand afterwards.
Owner
Whoever created the choir. Permanent, and the one role that cannot be reassigned.
Written against ChoralHub 2.29.1. The version number in the app's own footer opens the changelog, which is where new features are announced.

Kılavuzda bununla eşleşen bir şey yok. Daha kısa bir kelime deneyin.

Buradan başlayın

Kafa karışıklığının çoğunu açıklayan altı madde.

Nerede

app.choral-hub.com adresinden giriş yapılır. Eski choral-hub.com bağlantıları da sizi oraya götürür.

Önce bir koro

Onaylanmış bir koronun üyesi olana kadar menülerin neredeyse tamamı boştur. Bir koroya katılın ya da kendiniz kurun.

Tek bir sezondasınız

Provalar, eserler, kayıtlar ve duyurular bir sezona aittir. Siz aktif olanı görürsünüz.

Altı dil

İngilizce, Türkçe, Almanca, Fransızca, İspanyolca ve İtalyanca. Üstteki menüden istediğiniz an değiştirilir.

Neler değişti

Uygulamanın altındaki sürüm numarası, koristler için yazılmış Yenilikler sayfasını açar.

Üç rol

Korist Asistan Yönetici / Sahip Yukarıdaki seçici bu sayfayı sizinkine göre süzer.

Koroya girmek

Önce bir hesap, sonra bir koro. Bunlar iki ayrı adımdır.

Hesabınız

Adınız, e-postanız, bir parola ve ses partinizle kaydolun. Kaydolmak sizi bir koroya sokmaz. Parolanızı unutursanız giriş sayfası size e-postayla sıfırlama bağlantısı gönderir.

Bir koroya katılmak

  1. Koronun davet kodunu bir yöneticiden isteyin.
  2. Kodu davet kodu kutusuna girin. Henüz hiçbir koroda değilseniz kontrol paneli Koroya Katıl düğmesini gösterir. Zaten bir koroda şarkı söylüyorsanız avatarınızın altındaki menüyü açıp Koroları Yönet › Koroya Katıl deyin.
  3. Bu bir katılım isteği gönderir. İsteğinizi beklemede olarak görürsünüz.
  4. Bir yönetici onayladığında koro görünür.

Kimse sessizce katılmaz. Kod tek başına sizi içeri almaz.

Davet kodu alanıyla Koro Erişimi sayfası
Davet kodu kutusu. Bir yönetici onaylayana kadar bir şey olmaz.

Koro kurmak

Henüz hiçbir koroda değilseniz kontrol panelindeki Koro Oluştur ile, değilse avatarınızın altındaki menüden: Koroları Yönet › Yeni Koro Oluştur. İstek size değil, platform yöneticilerine gider. Onayladıklarında koronun Sahibi olursunuz. Bu rol devredilemez ve alınamaz, ve koro ilk sezonunu kendiliğinden alır.

Birden fazla koro

Birden çok koroda, her birinde farklı bir rolle şarkı söyleyebilirsiniz. Üstteki koro seçici aktif koronuzu belirler ve tüm sayfalar onu izler.

Koro ve sezon

Uygulamadaki her listenin altında iki süzgeç vardır. Bir şey görünmüyorsa sebebi genelde bunlardan biridir.

Aktif koro kimin malzemesine baktığınızı belirler. Aktif sezon ise onun hangi yılına baktığınızı. Bir liste hiçbir zaman veritabanının tamamı değildir, bu ikisinin kesişimidir.

Aktif sezonun adı her zaman menünün en üstünde, Kontrol Paneli'nin üzerinde, ve kontrol panelindeki koro kartında koro adının altında durur. Telefonda üst çubukta da koro adının altında görünür.

Bu yüzden koronuzun geçen yıl söylediği bir eser bu yılın kütüphanesinde olmaz. Kaybolmamıştır. Her eser koronun kütüphanesinde durur ve bir yönetici onu Yönetici › Kütüphane sayfasından ya da Kütüphaneden Ekle ile bu sezon için açar. Geçmiş sezonlar Yönetici › Sezonu Yönet içinde okunabilir kalır.

Aktif sezon yoksa içerik de yoktur. Bir koro sezonunu bitirip yenisini başlatmadıysa, her içerik sayfası liste yerine bir uyarı gösterir. Yönetici › Sezonu Yönet altından bir sezon başlatın veya etkinleştirin.

Ana Sayfa

Giriş yaptıktan sonra açılan sayfa.

Ana Sayfa: bağlantılarıyla koro kartı, ardından en yeni duyuru
Koronun kendi kartı, ardından en yeni duyuru.
  • Koronun kendi kartı, bir yönetici doldurduysa: logo, bir açıklama ve ortak sürücü ya da konser sayfası gibi faydalı bağlantılar. Uzun bir açıklamanın ilk satırı görünür, gerisi Devamını göster ile açılır. Koro sayfasını açmak için logoya ya da koronun adına dokunun.
  • En yeni duyuru, metninin başıyla birlikte büyük bir kartta. Duyurular sayfasını açmak için ona dokunun.
  • Bir sonraki provanız (tarihi, saati ve yeri), sezonun son eserleri ve kayıtlarınız için birer satır, sezonun takviminin yanında. Sayfasını açmak için satıra dokunun; takvimde her prova gününün altında bir nokta vardır, ne olduğunu görmek için güne dokunun. Bir sonraki prova gece yarısında değil, prova gerçekten bittiğinde değişir. Yaklaşan bir konser varsa Sonraki konser satırı ona kalan günleri sayar; konser günlerinin takvimde altın renkli bir noktası vardır.
  • Bu koronun bildirimleri, bu satırların altında bir kartta (üstteki zil tüm korolarınızınkini gösterir; başka bir korodan gelen bildirim o koronun adını taşır ve açınca önce sizi o koroya geçirir): kayıtlarınıza gelen geri bildirim, yeni eserler ve yeni materyaller, çağrıldığınız bir provaya eklenen eserler. Açmak için birine dokunun; × siler.
  • Çağrılmadığınız bir prova yine de görünür, böylece olduğunu bilirsiniz, ama soluklaştırılmış ve Bu provaya çağrılmadınız diye işaretlenmiş olarak. Ona gitmeyin.
  • Hızlı işlemler: eser ekle, prova planla, duyuru yayınla.

Eserler

Kütüphane. Her eserin kendi sayfası vardır ve öğrenmek için gereken her şeyi taşır.

Eserler sayfası sezonun eserlerini dosyalar gibi listeler. Koronuzun repertuarları varsa, her konser bunların üstünde bir klasör olarak durur: eserlerini program sırasıyla görmek için açın, geri dönmek için Tüm eserler'e basın. Klasörün içindeki Konser ayrıntıları, repertuarın kadrosu ve sahne düzeniyle kendi sayfasını açar.

Bir eser neler taşıyabilir

  • Nota. PDF sayfanın içinde açılır. Tam ekran düğmesi vardır, ve telefonda ya da tablette iki parmakla notanın kendisini yakınlaştırırsınız.
  • Tutti MIDI. Bütün partileri içeren tek bir MIDI dosyası; aşağıdaki çalışma oynatıcısı için.
  • Ses partisi kayıtları. Her parti için bir ses dosyası, hepsi birlikte çalınır.
  • Okunuş kayıtları. Metni sesli okuyan biri. Bir eser bunlardan birkaçını taşıyabilir, her biri kendi adıyla: düz bir okuyuş, ritmik bir okuyuş, şiir gibi okunmuş bir tane. Partilerle karışmadan, tek başlarına çalınırlar.
  • Söz çevirisi. PDF sayfada gösterilir, Word dosyası indirilir.
  • Referans kayıt, YouTube videosu veya Spotify parçası olarak, sayfanın içinde çalınır.
  • Bir açıklama ve korodaki herkesin yazabildiği yorumlar.

Dinle

Bir eserin oynatıcıları tek bir Dinle kartında durur. Eserin hem MIDI dosyası hem ses partisi kayıtları varsa, üstteki düğme MIDI ile Ses partileri arasında geçiş yapar. MIDI ile açılır. Geçiş yapmak çalanı durdurur.

MIDI çalışma oynatıcısı

MIDI oynatıcısı kendi partinizi öğrenmek için yapıldı:

  • Yavaşlatın: %50 ya da %75, veya tempoyu adım adım değiştirin. Ses perdesi değişmez.
  • Döngü: tek dokunuşla bulunduğunuz yerden dört ölçü tekrarlanır. Ölçüleri açılan kutudan değiştirin.
  • İstediğiniz yere gidin: zaman çizgisini sürükleyin ya da dokunun. ‹‹ ve ›› birer ölçü ilerletir.
  • Kendi partinizi öne çıkarın: yanındaki ◎ ile partiniz yükselir, diğerleri kısılır. M partiyi susturur, S tek başına çalar. Dosyada adı olmayan partiler ses aralığına göre adlandırılır (Soprano, Alto, Tenor, Bass); Adlar: Dosyadaki dosyanın kendi adlarını gösterir.
  • Sesi seçin (koro, piyano, üflemeli ya da yaylı) ve yarım ton transpoze edin.
  • Tempo'nun altındaki Metronom: her vuruşta bir tık, ölçünün ilk vuruşunda daha ince. Tempoyu ve döngüyü izler, bir partiyi tek başına çaldığınızda da devam eder.

Partilere doğru kaydırırken kontroller üst çubuğun altında sabit kalır. Çal'a ilk basışta enstrüman sesi indirilir; mobil veride biraz sürebilir. iPhone'da sessiz anahtarını kapatın, yoksa hiçbir şey duymazsınız.

Ses partisi oynatıcısı

Bir eseri açtığınızda bütün partiler aynı anda hazırlanır ve her birinin kendi ilerleme çubuğu olur. Ondan sonra birbirine kilitli çalarlar ve ne kadar dinlerseniz dinleyin kilitli kalırlar. Bir partiyi susturmak ya da tek başına dinlemek hiçbir şeyi bozmaz.

Bir telefon uzun bir eseri her partisiyle birlikte her zaman taşıyamaz. Taşıyamadığında kaç parti çalabileceğini söyler, ve siz müzik çalarken bile birini kapatıp başkasını açarak partiler arasında geçiş yaparsınız.

Çok kanallı oynatıcısıyla bir eser sayfası: her ses partisi için susturma, solo ve ses düzeyi
Bir eser ve oynatıcısı. M partiyi susturur, S tek başına çalar.

Eser eklemek

Eserler › Eser Ekle

Kütüphaneye yeni bir eser koymak

  1. Başlığı ve besteciyi doldurun. İkisi zorunludur, başka hiçbir şey değil.
  2. Nota PDF'ini ekleyin.
  3. Ses partileri altında Ses Partisi Ekle düğmesine basın. Her biri Soprano veya Tenor 2 gibi bir etiket ve kendi ses dosyasını alır. Her parti için tekrarlayın.
  4. Okunuşlar altında Kayıt Ekle ile aynısını yapın. Her birini ne olduğuna göre adlandırın, örneğin "yavaş okuma" veya "şiir gibi".
  5. Söz çevirisini PDF veya Word olarak ekleyin.
  6. Varsa bir tutti MIDI ekleyin: bütün partileri içeren tek dosya. Nota yazılımlarının çoğu bunu dışa aktarabilir.
  7. Bir YouTube bağlantısı, bir Spotify bağlantısı ya da ikisini birden yapıştırın.
  8. Yükleyin. İlerleme çubuğu her dosyayı ayrı ayrı değil, partinin tamamını sayar.

Dosyalar uygulamanın içinden değil doğrudan depolamaya gider, yani koca bir partisyon ya da uzun bir kayıt sorun değildir. Eser kendiliğinden aktif sezona bağlanır.

Kütüphane

Koronuzun bugüne kadar eklediği her eser, hangi sezon için eklenmiş olursa olsun, Yönetici › Kütüphane sayfasında durur. Her eserin bu sezon için bir anahtarı vardır. Yanındaki ok, eserin diğer sezonlarını onay kutuları olarak ve Kalıcı olarak sil düğmesini açar. Üstteki süzgeçler her şeyi, yalnızca bu sezonun eserlerini ya da yalnızca geri kalanları gösterir. Kütüphaneden yüklerken sezonları siz seçersiniz, mevcut sezon işaretli gelir. Eseri ileride kullanmak üzere saklamak için tüm işaretleri kaldırın.

Eserler sayfasındaki Kütüphaneden Ekle aynı işi öbür taraftan yapar: bu sezonda olmayan kütüphane eserlerini listeler ve seçtiklerinizi açar.

Bir eserin kendi sayfasındaki Bu sezon için kapat, eseri yalnızca mevcut sezondan çıkarır. Dosyaları, kayıtları ve yorumları kalır. Bir eseri kalıcı olarak silmek yalnızca Kütüphane'den yapılır; onaylamadan önce eserin bulunduğu bütün sezonlar gösterilir.

Provalar

Takvim, yoklama ve kendi devam kaydınız.

Provaları bulmak

Sayfanın bir liste ve bir takvim görünümü vardır, yaklaşan ve geçmiş diye ayrılmış. Telefonda takvim, provası olan günlerin altında nokta bulunan kompakt bir aydır; bir güne dokunun, provaları altında listelenir. Konserler de takvimde altın renginde (★) görünür: konser tarihi olan her repertuar o günde çıkar ve repertuarı açar. Prova sayılmazlar ve buradan eklenmezler. Bir provanın kendi sayfasında Genel Bakış ve Yoklama sekmeleri, üzerinde çalışılacak eserler ve bir yorum akışı bulunur.

Geleceğinizi bildirmek

Genel Bakış sekmesinden katılım bildiriminizi yaparsınız: geliyorum ya da gelemiyorum, istersen sebebini yazan bir notla. Sonradan değiştirebilirsiniz. Bu önceden söylediğinizdir ve prova akşamı alınan yoklamadan ayrıdır. Çağrılmış sahipler, yöneticiler ve asistanlar da kendilerininkini aynı şekilde, katılım özetinin altından yapar.

Katılım bildirimi menüsüyle yaklaşan bir prova
Yaklaşan bir prova. Katılım bildirimi tarihin altındaki menüdür.

Herkese açık olmayan provalar

Bir prova belirli ses partileri ya da adı verilen kişiler için açılabilir. Çağrılmadıysanız, prova kontrol panelinizde soluk görünür ve öyle işaretlenir, yoklamada yer almazsınız, sizden katılım bildirimi istenmez ve devamsız sayılamazsınız.

Provalar › prova › Yoklama

Yoklama almak

  1. Provayı açıp Yoklama sekmesine geçin.
  2. Yalnızca çağrılanlar görünür ve herkes Mevcut olarak başlar. Mevcut olanlar gizlidir: Mevcutları göster'i açın ya da isimle arayın. Yalnızca Yok, Mazeretli, Geç veya Erken Ayrıldı olanları değiştirin.
  3. Nedenini yazmak için satırdaki Mazeret'e basın; örneğin hasta ya da seyahatte.
  4. Değişiklikleri Kaydet'e basın. Basana kadar hiçbir şey kaydedilmez.

Bitirdiğinizde istatistikler Genel Bakış sekmesinde toplanır. Asistanlar bunların hepsini yapabilir.

Kendi kaydınız

Provalar › Yoklamam sezon boyunca devam yüzdenizi ve arkasındaki her provayı gösterir.

Yöneticiler aynı kaydı üye listesinden herkes için açabilir.

Prova oluşturmak

  • Ne zaman ve nerede: tarih, başlangıç saati, bitiş saati, yer. Uygulama her yerde 24 saatlik saat kullanır.
  • Kimin yöneteceği: şefin adı.
  • Kadro: provanın kendisi için serbest metin bir etiket.
  • Kimlerin çağrıldığı: tüm koro olarak bırakın, ya da ses partileri seçin, ya da tek tek koristleri.
  • Eserler: çalışmayı planladıklarınızı bağlayın.
  • Notlar: koronun önceden okuması gereken her şey.

Bir dönemin tamamı

Provalar › Toplu Oluştur

Bütün bir dönemi planlamak

  1. Dönemin başlangıç ve bitiş tarihini girin.
  2. Prova yaptığınız günleri işaretleyin, saati ve yeri girin. Bunlar hepsi için aynıdır.
  3. Önizlemeyi okuyun. Oluşturacağı her provayı sayısıyla birlikte listeler.
  4. Oluştur düğmesine basın.

Silmek de aynı şekilde çalışır. Takvimde bir günü seçip üzerindeki her şeyi silin, ya da tek tek provaları işaretleyip yalnızca onları silin.

Silip yeniden oluşturmayın, düzenleyin. Bir provayı silmek yoklamasını, yorumlarını ve bağlı eserlerini de beraberinde götürür. Tarih ya da salon değiştiyse provayı düzenleyin.

Kayıtlar

Yöneticinizin verdiği kayıt görevleri ve gönderdiğiniz her şey.

İki sekme: Görevler ve Kayıtlarım.

Görevler

Bir görev bir eseri, bir son tarihi ve ne istendiğini belirtir. Telefonunuzla kaydedip dosyayı göreve yüklersiniz. Uygulamanın içinde kayıt alma özelliği kaldırıldı, çünkü telefonu yanınızda tutmak çok daha iyi sonuç veriyordu.

  • Her görev Aktif mi yoksa süresi dolmuş mu olduğunu ve ne kadar vaktiniz kaldığını gösterir.
  • Yeniden yüklemek bir önceki kaydınızın yerine geçer. Ona yazılmış geri bildirim korunur ve önceki kayıt için diye işaretlenir.
  • Son tarihten sonra yükleme kabul edilmez. Görev görünür kalır, böylece neyi kaçırdığınızı görürsünüz.
Bekleyen bir görev ve Yükle düğmesiyle Pratik sayfası
Hâlâ açık bir görev, son tarihi ve Yükle düğmesi.

Geri bildirim

Geri bildirim ait olduğu kaydın altında görünür. Yalnızca yöneticiler yazar. Geldiğinde ekranın üstündeki zil size haber verir; kaydı açmak için bildirime dokunun. Bildirimin yanındaki × onu siler, üstteki Tümünü sil listeyi temizler.

Zil, bir korist her kayıt yüklediğinde sahiplere ve yöneticilere de haber verir. Asistanlara verilmez, çünkü başkalarının kayıtlarını dinleyemezler.

Gönderimleri Yönetici › Kayıtları İncele altında inceleyin. Oynatıcısı, önceki geri bildirimler ve ileri geri düğmeleri vardır, böylece listeye dönmeden bir yığını baştan sona bitirebilirsiniz. Görevleri Yönetici › Kayıt Görevleri altından ya da eserin kendi sayfasından tanımlayın.

Koronuz bunu kullanmıyor olabilir. Pratik tüm koro için kapatılabilir, o zaman menüden kaybolur. Hiçbir şey silinmez, geri açtığınızda her şey yerli yerindedir.

Duyurular

Tüm koro için haberler.

Duyurular korodaki herkese gider. Her biri yorum ve emoji tepkisi alır, böylece konser saatiyle ilgili bir soru sorulduğu yerde cevaplanır.

Duyurular › Yeni

Konser ayrıntılarını duyurmak

  1. Başlığı ve mesajı yazın.
  2. Program ya da çizelge varsa bir PDF ekleyin.
  3. İnsanları yönlendireceğiniz bir yer varsa bağlantı ekleyin.
  4. Yayınlayın. Korodaki herkes görür, en yenisi de Ana Sayfa'nın en üstünde durur.

Sorular duyurunun kendisine yorum olarak gelir, böylece cevap soruyla birlikte kalır.

Repertuarlar

Bir konser, kütüphane olarak değil program olarak.

Bir repertuar eserleri gerçekten seslendireceğiniz sıraya dizer, konser tarihi ve açıklamasıyla. Korodaki herkes açıp programı görebilir. Konser tarihi vermek onu takvime konser olarak koyar; tarihi değiştirmek ya da kaldırmak orada da taşır ya da kaldırır.

  • Program sırası eserleri sürükleyerek belirlenir.
  • Kadro bu konserde kimin söylediğini tutar, ki bu çoğu zaman tüm koro değildir.
  • Bir sahne düzeni daha önce kaydettiklerinizden eklenebilir. Eklendiğinde her üye nerede duracağını görür.
Repertuarlar › Repertuar Oluştur

Konser programı hazırlamak

  1. Bir ad, konser tarihi ve açıklama verin.
  2. Sayfasında Eserleri Yönet ile her eseri kütüphaneden ekleyin.
  3. Eserleri tutamaklarından sürükleyerek seslendirme sırasına dizin.
  4. Konser kadrosu altında Kadroyu belirle deyip kimin söyleyeceğini işaretleyin. Herkesse Tümünü seç orada.
  5. Sahne düzeni altında Formasyon Hesaplayıcı'da kaydettiklerinizden birini seçin.

Bir düzen eklendiğinde repertuarı açan her üye nerede duracağını görür. Eklenmediğinde o bölüm hiç görünmez.

Koro ve üyeler

Koroda kimler var.

Sol üstteki koro adına (telefonda menüdeki Koro'ya) ya da ana sayfadaki koro kartında logoya veya ada dokunun. Koro sayfası koronun açıklamasını ve bağlantılarını, ardından koroda olan herkesi gösterir.

Rehber herkesi ses partisine göre gruplar; en üstte her grubun sayısı vardır ve birine dokunmak yalnızca o grubu gösterir. İsimle arayın ya da yalnızca sahip, yöneticiler ve asistanları görmek için Yönetim düğmesine basın. Birine tıklamak kartını açar: fotoğraf, ses partisi, rol ve koroya katılım tarihi. Telefon, adres ve kan grubu diğer koristlere gösterilmez.

Rol rozetleri renklidir: sahip için altın, yöneticiler için mor, asistanlar için mavi, üyeler için gri.

Üyeleri yönetiyorsanız aynı sayfada daha fazlasını görürsünüz. Her kişinin kartına iletişim bilgileri ve bir Yalnızca yönetim kutusu eklenir: orada rolünü değiştirir, devamını ve kayıtlarını açar, bir yöneticinin yetkilerini ayarlar (yalnızca sahip) ya da kişiyi korodan çıkarırsınız. Listenin üstündeki Acil Durum Bilgisini Göster düğmesi kan grubu, telefon, adres ve araç durumuna geçer. Sahip ne çıkarılabilir ne de rütbesi düşürülebilir.

Profiliniz

Üç sekme, ve göründüğünden fazlasını yapan iki alan.

  • Kişisel Bilgiler: ad, fotoğraf ve uygulamanın sizinle konuştuğu dil.
  • Müzik Profili: ses partiniz ve boyunuz.
  • İletişim ve Acil Durum: telefon, adres, en fazla iki acil durum kişisi, aracınız olup olmadığı ve bir Sağlık ve beslenme kutusu.

Ses partileri Soprano, Mezzo-Soprano, Alto, Tenor, Bariton ve Bas'tır.

Boy bilgisi süs değildir. Formasyon hesaplayıcı her sırayı boya göre dizer, yani boş bırakılmış bir boy alanı sizi sahnede yanlış yere koyar. İletişim bilgileri acil durumlar ve ulaşım içindir. Diğer koristler bunları hiç görmez; yalnızca koronun üyelerini yönetenler görür.

Sağlık ve beslenme (kan grubu, bilinen hastalıklar, düzenli ilaçlar, alerjiler, beslenme) sağlık verisi olduğu için kendine ait tek bir rıza kutusunun ardındadır. Her alan isteğe bağlıdır. Yalnızca koronuzun sahibi ve yöneticileri görebilir; kutunun işaretini kaldırmak hepsini siler.

Telefonunuzda ya da bilgisayarınızda bildirim

Profilinizin en altında Tarayıcı bildirimleri › Aç derseniz, zile düşen her şey ChoralHub kapalıyken bile o cihazda bildirim olarak çıkar. Bildirimleri kapalı bir cihazda Ana Sayfa da aynı düğmeyi önerir; Şimdi değil bu öneriyi gizler. Bir bildirime dokunmak ilgili sayfayı açar. Cihaz başınadır; kullandığınız her telefon ya da bilgisayarda ayrıca açın. O cihazda çıkış yapmak da kapatır. iPhone ve iPad'de önce ChoralHub'ı Ana Ekran'a ekleyin (Paylaş, ardından Ana Ekrana Ekle), oradan açın ve bildirimleri içeriden açın.

Koro tercihleri

Profilinizden ayrı olarak, sesinizin en iyi kaynaştığı kişileri ve yanında durmayı sevdiklerinizi belirtebilirsiniz. Bunlar koro başınadır, çünkü belirli bir ses topluluğuyla ilgilidir.

Yönetici Paneli

Bir kartlar sayfası ve kenar çubuğunda bir Yönetim bölümü. Sahipler ve yöneticiler görür. Asistanlar görmez.

Panelin kendisi bir kartlar sayfasıdır: Üyeleri Yönet (Üyeler sayfasını açar), Kayıtları İncele, Kayıt Görevleri, Görünümü Özelleştir, Sezonu Yönet, Formasyon Hesaplayıcı, Koro Bilgilerini Düzenle ve Katılım İsteklerini İncele. Üstlerinde en sık kullanacağınız üç kısayol durur: Yeni Eser Ekle, Prova Planla ve Duyuru Yayınla.

Kenar çubuğunda ayrıca bir Yönetim bölümü var; tek tıkla açılmaya değer beş sayfayı tutar: Sezon İlerlemesi, Katılım İstekleri, Sezonlar, Koro Bilgileri ve Diziliş. Bölümün başındaki Genel Bakış bu kartlar sayfasıdır. Bölümü katlamak için başlığa basın; sizi bekleyen katılım isteği sayısı yine de yanında görünür. Telefonda menüde yalnızca Yönetim kalır, gerisine oradan ulaşırsınız.

Sezonlar

Paneldeki en belirleyici sayfa, çünkü aktif sezon diğer bütün sayfaların ne göstereceğine karar verir. Sezon oluşturmak birbiri ardına kendiliğinden açılan üç pencerelik bir zincirdir. İkincisini ya da üçüncüsünü erken kapatmayın.

Yönetici › Sezonu Yönet

Yeni sezon başlatmak

  1. Yeni Sezon düğmesine basın.
  2. Sezon Adı, Başlangıç Tarihi ve Bitiş Tarihi alanlarını doldurun. Bitiş tarihi isteğe bağlıdır.
  3. Oluştur deyin. Bu sezon kimler söyledi penceresi kendiliğinden açılır.
  4. Koroda hâlihazırda olan herkes zaten işaretlidir; koro sahibi her zaman işaretlidir. Bu liste yalnızca sezon arşivi için bir kayıttır: birinin işaretini kaldırmak onu korodan çıkarmaz, gördüklerini de kısıtlamaz. Birini korodan çıkarmak için Üyeler sayfasını kullanın.
  5. Onayla deyin. Sırada Eserleri İçe Aktar penceresi açılır.
  6. Önceki sezonlardan devam ettireceğiniz eserleri işaretleyip Onayla deyin.

Altıncı adımı atlarsanız telafisi var. Eserler sayfasındaki Kütüphaneden Ekle ile istediğiniz zaman getirebilirsiniz.

Yönetici › Sezonu Yönet

Yılı kapatmak

  1. Aktif sezonun üzerindeki Sezonu Bitir düğmesine basıp onaylayın.
  2. Koronun artık aktif sezonu yoktur ve her içerik sayfası liste yerine bir uyarı gösterir.
  3. Yenisini oluşturun, ya da geçmiş bir sezonun üzerindeki Devam Et ile onu yeniden etkinleştirin.

Geçmiş bir sezonu etkinleştirmeden okumak için üzerindeki Goruntule düğmesine basın. Aktif bir sezon silinemez, önce bitirilmesi gerekir.

Sezon ilerlemesi

Sezondaki her eserde koronun nereye geldiği. Siz bunu zaten biliyorsunuz; uygulamada bir karşılığı yoktu, dolayısıyla kimse bakıp öğrenemiyordu. Sırasıyla altı basamak: Başlanmadı, Nota öğreniliyor, Baştan sona söyleniyor, Ezberlendi, Cilalanıyor, Konsere hazır. Çubuk yukarı çıktıkça dolar; sayfanın üstündeki sayı sezon genelindeki ortalamadır.

Koristler bunların hiçbirini görmez. Bir eserin yanındaki aşamayı yalnızca sahipler, yöneticiler ve asistanlar görür: "bu eser hazır değil", kendi planlamanız için verdiğiniz bir yargıdır ve bağlamından koparıldığında koriste yararlı bir şey değil, moral bozucu bir şey söyler. Aşamayı sahipler ve yöneticiler değiştirir; asistan bir eserin nerede olduğunu görebilir ama buna karar veremez.

İlerleme bir sezona aittir; gelecek sezon yeniden söylediğiniz bir eser geçen yılın cevabını devralmaz, Başlanmadı'dan başlar. Bir eserin burada görünmesi için aktif sezonun repertuvarında olması gerekir.

Yönetim › Sezon İlerlemesi

Bir eseri ilerletmek

  1. Liste en az hazır olandan başlar, yani üzerinde çalışılması gereken en üsttedir.
  2. Eserin yanındaki Güncelle düğmesine basın.
  3. Ulaştığı basamağı seçin.
  4. Hangi provanın ilerlettiğini seçin. Liste bu sezonun son provalarıdır, en yeniden başlar ve o eseri en son çalışan provayı seçili getirir. Karar bir provadan gelmediyse — örneğin gönderilen kayıtları dinledikten sonra — Prova yok'u seçin.
  5. Neyin üzerinde çalışılacağına dair söylenecek bir şey varsa not ekleyin. İsteğe bağlıdır.
  6. Kaydet'e basın.

Geriye gitmek de mümkün. Bir ay bırakılan eser gerçekten geriler; bunu kaydetmek, gerilememiş gibi yapmaktan daha dürüsttür.

Provayı belirtmek fazladan bir saniyeye değer: geçmişin ve zaman çizelgesinin bir eseri yalnızca ne zaman değil neyin ilerlettiğini söyleyebilmesini sağlayan şey budur. Yalnızca gerçekleşmiş provalar ve yalnızca yürüttüğünüz sezondakiler sunulur.

Provalar › herhangi bir prova

Salondayken güncellemek

  1. Provayı açın. Eserler listesindeki her eser, o provadaki durumunu gösterir — bugünkü durumunu değil. Prova sayfası o akşamın kaydıdır; ağustostaki bir provayı açtığınızda ağustosun cevabını görürsünüz.
  2. Eserin yanındaki Güncelle'ye basıp yeni basamağı seçin.

Buradan yapılan güncelleme provayla birlikte kaydedilir; böylece geçmiş yalnızca ne zaman değil, hangi provada ilerlediğini de söyler.

Yönetim › Sezon İlerlemesi

Geçmişi okumak veya yanlış tıklamayı geri almak

  1. Eserin üzerindeki güncelleme sayısına basın, örneğin 6 güncelleme.
  2. Her değişiklik en yeniden eskiye listelenir: kimin yaptığı, ne zaman ve varsa notu.
  3. Yanlış girdinin yanındaki Sil'e basın.

En yeni girdiyi silmek, ondan öncekini yeniden geçerli kılar. Hatayı silin, unutmak istediğiniz geçmişi değil.

Kategoriler ve sezonun zaman çizelgesi

İlerleme sayfasının üç sekmesi var. Şu An yukarıdaki listedir. Zaman Çizelgesi sezonun nasıl gittiğini grafikler. Kategoriler ise repertuvarı gerçekte nasıl düşünüyorsanız öyle grupladığınız yerdir.

Kategori sizin kendi gruplamanızdır — akapella, senfonik, belirli bir konser türü için olan eserler. Bir eser aynı anda birkaçında olabilir; hiçbirine koymadıklarınız Diğer sayılır. Bu, konser repertuvarı değildir: repertuvar tek bir konserin, tarihi ve kadrosuyla birlikte program listesidir; kategori daha geniştir ve birkaç konser boyunca sürer.

Üç sekmedeki her şey etkin sezona aittir. Yürüttüğünüz sezonda olmayan bir eser ne görünür ne de sayılır; böylece sayfadaki sayılar her zaman önünüzdeki sezonla tutarlıdır.

Yönetim › Sezon İlerlemesi › Kategoriler

Kategori oluşturmak ve doldurmak

  1. Üstteki kutuya bir ad yazın ve Ekle'ye basın.
  2. Oluşturduğunuz kategorideki Eserleri düzenle'ye basın.
  3. Ona ait eserleri işaretleyin. Arama kutusu uzun listeyi daraltır.
  4. Kaydet'e basın.

Kaydettikçe sayılar değişir: eserler dosyalandıkça Diğer'den çıkar. Bir kategoriyi silmek hiçbir eseri silmez — eserleri yalnızca Diğer'e geri döner.

Yönetim › Sezon İlerlemesi › Zaman Çizelgesi

Sezonun nasıl gittiğini görmek

  1. Üstteki grafik zaman içindeki hazırlıktır; her kategori için bir çizgi, ayrıca tüm sezon için daha kalın bir çizgi.
  2. Alttaki grafik, her grubun eserlerinin bugün altı aşamaya nasıl dağıldığını gösterir.
  3. Göster satırındaki bir ada basarak o grubu gizleyin ya da gösterin. İki grafik de sizi izler.

İkisini birlikte okuyun. Her eseri yarı öğrenilmiş olduğu için %60'ta olan bir grup ile eserlerinin yarısı bitmiş yarısı hiç çalışılmamış olduğu için %60'ta olan bir grup çok farklı sorunlardır; bunu yalnızca alttaki grafik ayırt eder.

Çizgiler zaten kaydetmekte olduğunuz ilerlemeden çizilir — hiçbir şey açmanız gerekmedi. Bir eser, dokunmadığınız günlerde aşamasını korur; yani sessiz geçen iki hafta düşüş olarak değil düz bir çizgi olarak görünür. Kaydettiğiniz son şey haftalar öncesi olsa bile çizgi bugüne kadar uzanır ve sonrasındaki boşluk sezondan ne kadar kaldığıdır.

Bir güncelleme, yazdığınız güne göre değil belirttiğiniz provaya göre tarihlenir. Sezonu sonradan doldurursanız tabloyu dürüst kılan şey budur: ekimdeki provada olanı kaydedersiniz, ekime düşer. Yani bir kez oturup dönem boyunca ilerleyerek gerçek bir zaman çizelgesi elde edebilirsiniz. Karar bir provadan gelmediyse Prova yok onu bugüne tarihler.

Üyeler

Üyeler

Birine yetki vermek

  1. Arama kutusuyla bulun ya da en üstte ses grubuna dokunun.
  2. Kartını açın ve Yalnızca yönetim kutusunda Rol menüsünü Yönetici veya Asistan yapın.
  3. Çıkan uyarıyı onaylayın.

Sahibin kartında ne rol menüsü ne de çıkarma düğmesi vardır. Bu bilinçlidir ve uygulamada etrafından dolaşmanın yolu yoktur.

Üyeler

Acele bir telefon numarası bulmak

  1. Acil Durum Bilgisini Göster düğmesine basın.
  2. Kırmızı bir acil durum şeridi belirir ve her kişinin kartında kan grubu, telefon, boy, adres, araç durumu, acil durum kişileri ve paylaşmayı seçtiği alerji, hastalık ya da ilaçlar görünür.
  3. Arama kutusu da genişler. Artık kan grubu veya telefon numarasıyla arayabilirsiniz.
  4. İşiniz bitince Acil Durum Bilgisini Gizle deyin.

Bu bilgileri üyeler kendileri Profil altında doldurur. Boş bir alan, kimsenin girmediği anlamına gelir.

Kayıt görevleri

Yönetici › Kayıt Görevleri

Korodan kayıt istemek

  1. Görev Oluştur düğmesine basın.
  2. Menüden Eser seçin. Zorunludur ve yalnızca bu sezondaki eserleri listeler.
  3. Bir Görev Başlığı yazın. Zorunludur.
  4. Hangi ölçüler ya da hangi parti olduğunu söylemek isterseniz Açıklama ekleyin.
  5. Son Tarih girin. Zorunludur ve uygulanır, sonrasında yükleme kabul edilmez.
  6. Kaydedin. Görev üyelerin Pratik sayfasında hemen belirir.

Her görev kartı ardından Aktif ya da Süresi dolmuş durumunu ve gönderim sayısını gösterir. Gönderimleri Görüntüle onları açar. Bir görevi silmek, ona yapılmış kayıtları silmez.

Yönetici › Kayıtları İncele

Bir yığın gönderimi baştan sona bitirmek

  1. Sırala: ile sıralayın, ya da koriste, esere veya ses partisine göre arayın.
  2. İlk satırdaki İncele düğmesine basın. Bir oynatıcı açılır.
  3. Dinleyin, sonra Geri Bildirim Ekle alanına yazıp Geri Bildirim Gönder deyin.
  4. Kapatmadan devam etmek için İleri düğmesine ya da yön tuşlarına basın.
  5. Esc inceleyiciyi kapatır.

Aynı kayda daha önce yazılmış geri bildirim kutunun üstünde görünür, böylece ona ne söylediğinizi görürsünüz.

Formasyon

Önce üç karar, sonra düzen. Biçim seçimi sanılandan önemlidir, o yüzden düğmeye basmadan üçünü de bilmekte fayda var.

  • Karışık (dengeli kaynaşma). Ses partileri iç içe geçirilir, ses koronun tamamında kaynaşır.
  • Gruplu (SATB). Bütün sopranolar bir arada, bütün altolar bir arada, ve böyle devam eder. Alışılmış prova düzeni.
  • Geleneksel yay (sahne). Baslar kenarlarda, tiz sesler ortada.
Yönetici › Formasyon Hesaplayıcı

Sahne düzeni kurmak

  1. Sıra sayısını 1 ile 5 arasında belirleyin.
  2. Yukarıdaki üçünden bir biçim seçin. Yanındaki küçük i işareti hepsini sayfanın içinde anlatır.
  3. Bu formasyondaki koristler altında seçim düğmesine basın. Varsayılan olarak herkes dâhildir, ki bu bir konserde nadiren istenen şeydir.
  4. Durmayacakların işaretini kaldırın, ya da hepsini temizleyip duracakları işaretleyin. Bitince kapatın.
  5. Formasyon Oluştur düğmesine basın.
  6. Algoritma birini tuhaf bir yere koyduysa sürükleyip taşıyın.
  7. Formasyonu Kaydet deyip "Bahar Konseri" gibi bir ad verin.

Her sıranın içinde kişiler boya göre dizilir, yani profilinde boyu boş olan yanlış yere düşer. Formasyonu Yazdır salona götüreceğiniz bir çıktı verir, ve kaydedilmiş bir formasyon bir repertuara eklenerek tüm koroya gösterilebilir.

Koro bilgileri

Yönetici › Koro Bilgilerini Düzenle

Tüm koronun önüne kalıcı bir şey koymak

  1. Logo Yükle düğmesine basın. JPEG, PNG veya WebP, en fazla 5MB.
  2. Koro hakkında metnini yazın. Her üyenin kontrol panelinde görünür.
  3. Her faydalı bağlantı için Bağlantı Ekle deyip bir etiket ve adres girin. Ortak sürücü, site, sosyal medya hesabı.
  4. Değişiklikleri Kaydet deyin.

Herkesin sezon boyunca ihtiyaç duyacağı bir şeyi vermenin en hızlı yolu budur. Duyuru akıp gider, koro kartı gitmez.

Katılım istekleri

Yönetici › Katılım İsteklerini İncele

Birini içeri almak

  1. Sayfa davet kodunuzu girmiş herkesi, istedikleri tarihle birlikte listeler.
  2. Onayla ya da Reddet düğmesine basın.

Onaylananlar hemen Üyeler'de, sıradan üye olarak görünür. Daha fazlası gerekiyorsa sonradan yetki verin.

Davet kodu

Yönetici Panelinde değildir. Avatarınızın altındaki menüyü açıp Koroları Yönet deyin. Kod koronuzun kartında bir Kopyala düğmesiyle durur ve yalnızca sahip ile yöneticilere görünür. Uygulamada kodu yenilemenin bir yolu yoktur, o yüzden kalıcı sayın ve bilerek dağıtın.

Görünümü özelleştirmek

Yönetici › Görünümü Özelleştir

Koronuzun kullanmadığı bir bölümü gizlemek

  1. Çalışma ve Kayıtlar anahtarını kapatın.
  2. Kaydedin. Yeşil bir Kaydedildi belirir.

Pratik girişi herkesin menüsünden kaybolur, ve kayıtlar eser sayfalarından da çıkar. Hiçbir şey silinmez. Geri açtığınızda her görev, her kayıt ve her geri bildirim tam bıraktığınız yerdedir.

Kim ne yapabilir

Sahip ve yönetici pratikte aynıdır. Asistan ise dar bir roldür, küçük bir yönetici değil.

Bir asistan provaları yürütmeye yardım etmek için vardır. Yoklamayı alır, eser bağlar ve prova yorumu yazar. Yönetici Panelini hiç görmez, rol değiştiremez, sezon yönetemez ve kayıtlara geri bildirim yazamaz.

İşlem Korist Asistan Yönetici / Sahip
Eserler
Nota, parti ve çevirileri açmakEvetEvetEvet
Bir esere yorum yazmakEvetEvetEvet
Eser eklemek, düzenlemek, silmekHayırHayırEvet
Bir eserin hazırlık aşamasını görmekHayırEvetEvet
Bir eserin hazırlık aşamasını kaydetmekHayırHayırEvet
Provalar
Takvimi görmek ve katılım bildirmekEvetEvetEvet
Kendi devam kaydını görmekEvetEvetEvet
Yoklama almakHayırEvetEvet
Provaya eser bağlamakHayırEvetEvet
Prova yorumu yazmakHayırEvetEvet
Prova oluşturmak, düzenlemek, silmekHayırHayırEvet
Başkasının devam kaydını görmekHayırHayırEvet
Pratik
Bir göreve kayıt yüklemekEvetEvetEvet
Kayıt görevi tanımlamakHayırHayırEvet
Bir kayda geri bildirim yazmakHayırHayırEvet
Başkalarının kayıtlarını dinlemekHayırHayırEvet
Duyurular ve konserler
Okumak, yorum yazmak, tepki vermekEvetEvetEvet
Duyuru yayınlamakHayırHayırEvet
Repertuar ve sahne düzenlerini görmekEvetEvetEvet
Repertuar ya da formasyon kurmakHayırHayırEvet
Koronun kendisi
Üye rehberine bakmakEvetEvetEvet
Yönetici Panelini açmakHayırHayırEvet
Rol değiştirmek, üye çıkarmakHayırHayırEvet
Acil durum bilgilerini görmekHayırHayırEvet
Davet kodunu görmek ve paylaşmakHayırHayırEvet
Katılım isteklerini onaylamakHayırHayırEvet
Sezon ve koro bilgilerini yönetmekHayırHayırEvet

Yalnızca koronun sahibi ne çıkarılabilir ne de rütbesi düşürülebilir. Yukarıdakilerin hepsinde sahip ve yönetici aynı davranır.

Sözlük

Uygulamanın kendine özgü biçimde kullandığı kelimeler.

Aktif koro
Her sayfanın o an gösterdiği koro. Birden fazla koroya üyeyseniz üstteki seçiciyle belirlenir.
Sezon
Bir çalışma yılı. Provalar, eserler, kayıtlar ve duyurular birine aittir, bu yüzden geçen yılın malzemesi bu yılın listelerini doldurmaz.
Çağrılmak
Belirli bir provanın kimler için açıldığı listesinde olmak. Çağrılmadıysanız o prova için devamsız sayılamazsınız.
Kadro
Bir provanın kimin ya da neyin için olduğunu söyleyen serbest metin etiket. İnsanlar okusun diye yazılır, süzgeç olarak kullanılmaz.
Katılım bildirimi
Geleceğiniz konusunda önceden söylediğiniz şey. Ne olduğunu kaydeden yoklamadan ayrıdır.
Yoklama
Prova akşamı alınan devam kaydı. Kişi başına tek durum: mevcut, yok, mazeretli, geç veya erken ayrıldı.
Görev
Bir yöneticinin istediği kayıt: bir eser, bir son tarih ve bir açıklama. Yeniden yüklemek önceki kaydınızın yerine geçer.
Repertuar
Bir konser programı. Eserler seslendirme sırasında, kimin söylediğini gösteren bir kadro ve isterseniz sahne düzeni.
Formasyon
Kaydedilmiş bir sahne düzeni. Üç biçimden biriyle kurulur: karışık, partilere gruplu ya da geleneksel yay. Her sıra boya göre dizilir, sonrasında her şey elle sürüklenebilir.
Sahip
Koroyu kuran kişi. Kalıcıdır ve devredilemeyen tek roldür.